
Indevolt SolidFlex 3000 AC Review
The first solar battery with semi-solid-state cells, tested by The Home Battery Lab: installation, app, back-up socket and measured efficiency.
- Hands-on review
- 4.3 out of 5
- Plug-in battery

- Score: 4.3 out of 5 after hands-on testing by The Home Battery Lab.
- Best points: 3,000 W output, semi-solid cells, 10-minute installation, dynamic tariff mode and local control.
- Weak points: AI mode (Beta), 79.6% measured round-trip efficiency and €442 per kWh at the smallest size.
- Price: €795 for the 1.8 kWh unit in September 2026.
Our own testing
Everything in this review that says we measured or installed it comes from The Home Battery Lab's own tests. Maker figures in the specification tables are labelled as such. Scores are ours and are not paid for.
Summary review
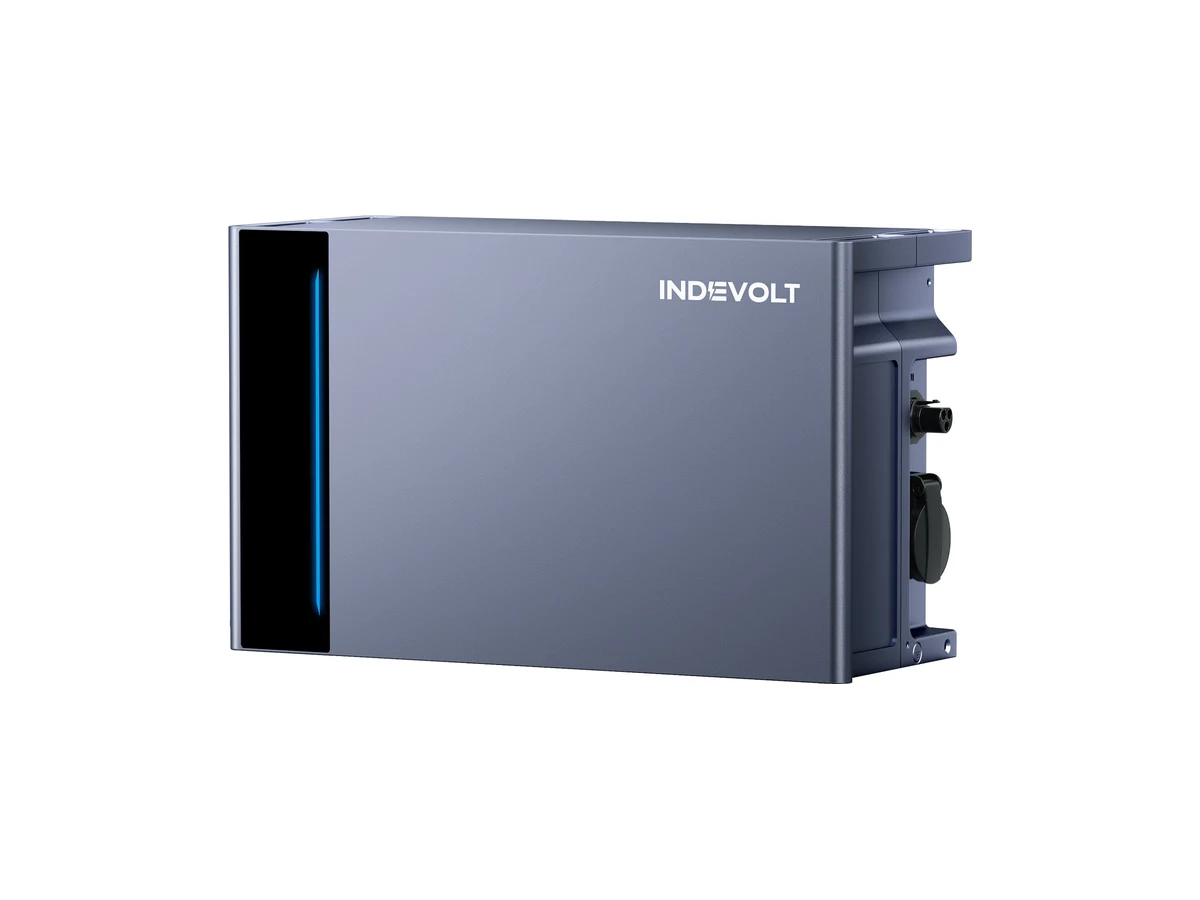

The Indevolt SolidFlex 3000 AC is a powerful and easy-to-use home battery with up to 3,000 W of charging and discharging power. Installation took just 10 minutes, and the battery runs silently.
Its expandable storage capacity, smart charging features and Home Assistant support make it a flexible choice for many households.
Indevolt
Indevolt is an energy storage brand founded by Power Genius in 2022. The brand focuses on plug-in home batteries and other products designed to make home energy storage easier. Its name combines "Independent" and "Volt", reflecting its focus on giving households more control over their own energy.
The team behind Indevolt has experience in solar energy, battery storage and electric vehicles, with members who previously worked at companies such as Siemens, Nokia and Huawei. Indevolt launched its plug-and-play storage system in 2024.
Indevolt focuses mainly on modular battery systems, smart energy management and products that homeowners can install with relatively little technical work. Its technology includes semi-solid batteries, local communication, AI-based controls and support for Home Assistant. Read more in our Indevolt brand guide.
The most important attributes
- Power (3,000 W): Maximum charge and discharge power of 3,000 W, which is usually enough to absorb most electricity use inside the house.
- Modular capacity: You can expand the battery by adding extra battery modules. Because the system is modular, the modules can be stacked on top of each other like Lego blocks. The battery modules come in two sizes, 1.8 kWh and 3.6 kWh.
- Semi-solid batteries: Semi-solid cells are the newest battery technology. They offer better safety and, according to Indevolt, do not generate smoke or fire even under extreme conditions. The manufacturer guarantees 10,000 charging cycles.
- Back-up power: An integrated power socket (off-grid output) provides back-up power during a power cut.
- Smart control and P1 integration: It connects with several meters, including Solarman, HomeWizard, Everhome and Shelly, to balance home energy use automatically and support dynamic energy tariffs.
- BatteryFlex technology: Batteries with different capacities, chemistries and ages can work together. Indevolt says this improves usable capacity, reduces uneven wear and helps extend system life.
What do we think of the design? (4.5/5)
The SolidFlex 3000 AC has a solid, industrial design with a metal housing. This understated look helps the battery blend into places such as a garage, shed or utility room without standing out too much. You can also switch off the lighting completely, which makes it even easier to place the battery wherever you want.
It also uses passive cooling, so there are no fans constantly making noise. You may only hear an occasional soft click. This makes the battery very quiet in everyday use and gives you more freedom when choosing where to install it.
Design4.5/5
Technical specification
The figures below are the maker's. Our own measurements follow further down. See the full Indevolt SolidFlex 3000 AC page for sources.
Capacity and modules
Power
Battery and lifespan
Size and weight
Electrical and connectivity
Environment
When do you actually get to use the maximum power?
The charging and discharging power increases as you add more battery modules. Without an expansion battery, the system is limited to 1,000 W discharge and 896 W grid charging, while larger setups can reach the full 3,000 W in both directions. This is important to consider before buying an Indevolt SolidFlex 3000.
| Configuration | Extra battery capacity | Max. discharge power | Max. grid charging power |
|---|---|---|---|
| No expansion battery | n/a | 1,000 W | 896 W |
| 1 × SFA1800 | 1.8 kWh | 2,000 W | 1,792 W |
| 2 × SFA1800 or 1 × SFA3600 | 3.6 kWh | 3,000 W | 2,688 W |
| 3 × SFA1800 or 2 × SFA3600 | 7.2 kWh | 3,000 W | 3,000 W |
Installing a home battery safely
When installing a home battery, make sure it is placed on a stable surface in a dry, well-ventilated area with enough space around it. For a plug-in battery, use a grounded wall socket and avoid extension leads or power strips. If you want to charge or discharge at higher power for longer periods, a dedicated circuit with a maintenance switch is required.
Want to know more? Read our installation day and commissioning checklist for the important steps.
Installation guide: how we installed the SolidFlex 3000
We started by choosing the right location for the home battery. We thought about placing it in the corner of the living room, but decided it was best to place it in the garage, next to the fridge.
When we were installing the battery, we realised that the floor wasn't completely level. That's why we put the four adjustable feet under the battery, so we could make sure it stood on a flat surface.
After we attached the feet, it was time to remove the protective covers from the connectors and stack the battery modules on top of each other. Overall, the installation was very easy. Everything was fairly straightforward and the different parts fitted together exactly as you would expect.
We did notice one small issue when securing the battery to the wall with the included brackets: the mounting holes on the battery did not line up perfectly. This was not a major problem for our setup, but it could become more inconvenient with larger systems that use several stacked battery modules.
Installing the Indevolt SolidFlex 3000
How to get started in the Indevolt app
These are the steps we followed to create an account and add the battery and the P1 meter.
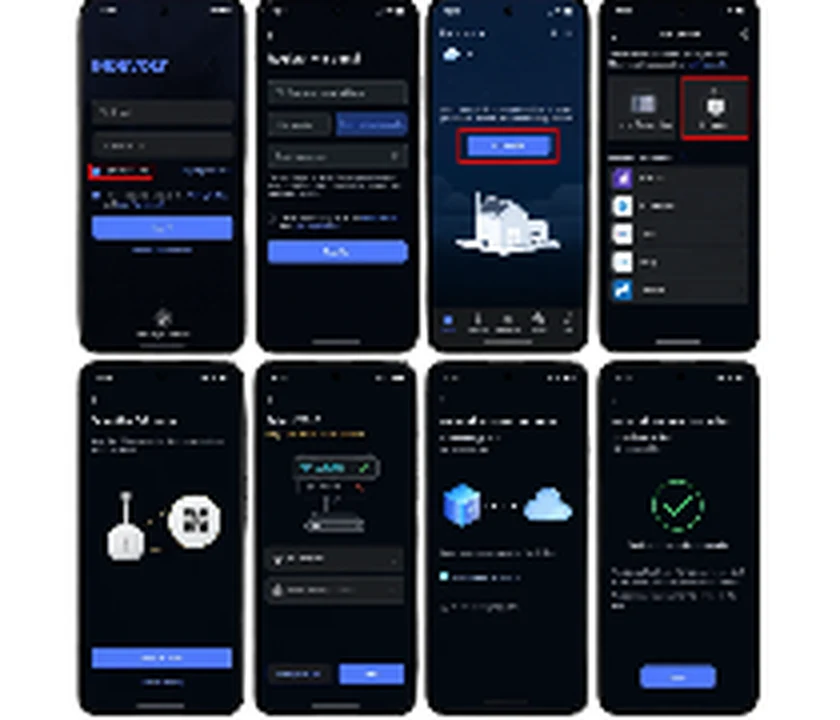
- I opened the Indevolt app and clicked Register to create my account.
- I entered my email address and clicked Send code to receive the verification code.
- Once my account was created, I could start adding the devices.
- I made sure I was connected to a 2.4 GHz Wi-Fi network and that Bluetooth was turned on. Then I clicked Add device and followed the instructions.
- After connecting to the device via Bluetooth, I scanned the QR code on the device.
- I entered my Wi-Fi password to connect the battery or P1 meter to Wi-Fi.
- After entering the Wi-Fi password, the device started connecting.
- The app then checked the Bluetooth and Wi-Fi connection and connected the device to the cloud.
- Once everything was connected successfully, I saw a large checkmark on the screen.
- I opened Devices and checked that both the battery and P1 meter were visible and connected to Wi-Fi and to each other. At that point, the installation was complete.
How does a P1 meter work?
A P1 meter connects to the P1 port of your smart meter and reads live data about the electricity flowing in and out of your home. This includes how much power you are currently using from the grid and how much electricity you are sending back, for example from your solar panels.
A home battery can use this information to react automatically. If your solar panels are producing more electricity than your home is using, the battery can start charging. If your home starts using electricity from the grid, the battery can discharge to reduce that grid use.
What is the LoRa function, and how does it work?
LoRa creates a direct wireless connection between the P1 meter in your smart meter and the home battery. The P1 meter reads how much electricity your home is using or sending back to the grid and sends this information to your home battery via LoRa.
The battery then uses that data to decide when it needs to charge or discharge. Because LoRa works well through walls and over long range, the connection is usually much more stable than Wi-Fi.
Setting up LoRa in the app
How far does the LoRa connection actually reach?
In our video test, we check how far the Indevolt P1 meter can be placed from the battery while keeping a stable LoRa connection. We move further away step by step and check whether the battery continues to receive data from the smart meter.
What do we think of the installation process? (5.0/5)
The installation process went very smoothly and took us only around 10 minutes in total. Connecting and pairing the battery was quick and straightforward, especially because of the Indevolt LoRa function. This allows the P1 meter and battery to communicate directly without needing to be connected to the same Wi-Fi network. It gives you much more freedom when choosing where to place the battery, for example in a shed or another location outside the house.
Installation5.0/5
App functionality
The app has five operating modes. Each one is shown below with the steps we took to set it up.
Self-consumption
The battery charges when your solar panels produce more electricity than your home is using. When your home starts taking power from the grid, the battery begins to discharge. In practice, this usually means charging during the day and using the stored energy in the evening or at night. You can also choose whether extra solar power is sent back to the grid when the battery is full.
Self-consumption: setup steps
Charge and discharge schedule
You can set fixed times for charging and discharging during the day. You can also choose how much power the battery should use in each time period.
Charge and discharge schedule: setup steps
Real-time control
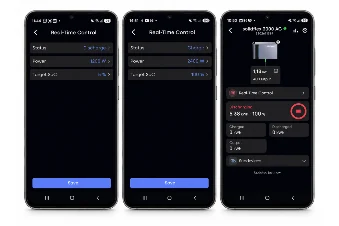
This mode lets you control charging and discharging yourself. You can set the power level and choose how full or empty the battery is allowed to become. The settings were very easy to configure in the app. After making the changes, they started working straight away, so we could immediately see that the battery was responding.
Real-time control: setup steps
Dynamic price mode
If you have a dynamic energy tariff, the battery can automatically charge when electricity prices are low and discharge when prices are higher.
Dynamic price mode: setup steps
After setting up Dynamic Pricing Mode, you can also adjust the charging and discharging schedule and the market price settings. To change the schedule, tap the pen icon in the top-right corner.
Here, you can adjust the mode, control method, power and target state of charge. This is especially useful if you do not have a large solar surplus, as your battery may not always charge to 100%. By adjusting the schedule, you can make sure the battery charges when needed.
You can also change how the battery decides which electricity prices are high or low. By pressing the pen icon next to the market prices, you can choose between Manual, Auto and Smart settings.
In Manual mode, you set the exact price limits yourself. Auto mode lets you choose how many hours per day should count as high or low-price periods. Smart mode looks at the difference between the highest and lowest prices and automatically decides when it makes sense to charge or discharge.
This gives you quite a lot of control over how the battery reacts to dynamic electricity prices, while still letting you choose how much you want to manage yourself. For the economics, see our guide to dynamic energy contracts.
AI mode (Beta)
This mode uses data such as your energy use, solar production and weather forecasts. The battery uses this information to predict when energy will be needed and automatically adjusts charging and discharging to reduce energy costs and increase self-consumption. This mode is still in Beta.
AI mode: setup steps
What do we think of the app functionality? (4.0/5)
The standard operating modes are quite easy to set up and mostly speak for themselves. An average user should be able to configure these without much difficulty. The smart functions, however, are more complicated if you are not already familiar with home batteries. When setting up AI Mode or Dynamic Tariff Mode, the app gives very little explanation about how certain settings affect the battery, such as the prices you enter, selecting the correct energy supplier or understanding the schedule that is created. The setup process could therefore use much clearer guidance.
That said, once everything is configured correctly, dynamic tariff mode worked as expected during our testing. The AI mode is still in Beta and you do notice that while using it. The decisions the AI makes are not always the most logical, which could cause you to lose out on some of the savings you could have made. We would not recommend using it yet; stick to dynamic tariff mode instead.
App functionality4.0/5
Local API and Home Assistant integration
We are also working on our own smart dashboard for the Indevolt SolidFlex 3000 AC. This will make it possible to control the battery more precisely, use home automation and, for example, stop the battery from discharging while your EV is charging. Follow The Home Battery Lab to see it when it is ready.
What do we think of the back-up power socket? (4.0/5)
If the power goes out, solar panels and home batteries normally switch off for safety, unless the solar panels are connected directly to the MPPT of a battery. With the Indevolt off-grid socket, you can still power devices directly from the battery, even when it is not connected to the grid. The maximum output depends on the battery setup. During a power cut, the system switches to battery power in about 10 milliseconds.
The back-up power socket is useful, but it is not as complete as the back-up solution you would get from a fixed home battery or a power station. Those systems can often support a larger part of the home, or in some cases the entire house. With a plug-in battery, you only have a back-up socket, so you are limited to powering a few appliances, usually with an extension lead. The back-up socket on the Indevolt SolidFlex 3000 AC is quite powerful for a plug-in battery, and it can support more or heavier appliances than many other plug-in batteries.
Want to see how it works in real life? Watch our test of the back-up socket in a camper, to see how many appliances it can keep running.
Back-up power socket4.0/5
Testing the round-trip efficiency at different settings
The round-trip efficiency (RTE) shows how much of the stored energy can actually be used later in your home. When you charge or discharge a battery, energy needs to be converted by the inverter. This causes some energy to be lost during the process. Our round-trip efficiency explainer goes deeper.
For example, if you have a battery with 10 kWh of capacity and an RTE of 90%, you will get 9 kWh back after storing 10 kWh of electricity. This means 1 kWh gets lost in the process. If this happens daily, you lose a significant amount of energy.
Before we could test the RTE of the Indevolt SolidFlex 3000, we first needed to install a kWh meter. This way, we could track how much electricity was lost during an entire charging cycle. During the test, we used a charging power of 1,200 W and a discharging power of 2,400 W. By measuring how much electricity went into the battery and how much we got back out, we could calculate the round-trip efficiency over a full cycle.
RTE result: 79.6%. After testing the battery over full charging and discharging cycles, we measured an average round-trip efficiency of 79.6%. This means that for every 10 kWh of electricity stored in the battery, approximately 7.96 kWh could be used again. The remaining 2.04 kWh was lost during the charging and discharging process, so roughly 20.4% of the electricity is lost during a complete cycle. These results were measured at 1,200 W charging and 2,400 W discharging. The efficiency may differ at other power settings.
Testing the stand-by use of the home battery
Plug-in home batteries can remain in standby mode in two ways: by drawing electricity from the grid (AC) or by using energy stored in the battery itself. The Indevolt SolidFlex 3000 has an AC standby consumption of 6.58 W, which is above average. We measured this using a smart plug connected to the AC power cable over an extended period, with the off-grid output switched off.
However, the battery performs much better when it comes to internal energy loss. At just 1.93 W, it ranks among the best in this category. To measure this, we left the battery in standby mode for an extended period and tracked how long it took for the state of charge to drop by 1%. We then used the battery's total capacity to calculate the average internal energy loss.
This is the price per kWh of capacity
The Indevolt SolidFlex 3000 AC is available for €795 (September 2026). With a capacity of only 1.8 kWh this comes to about €442 for every kWh. The prices go down significantly when you add more capacity.
| Configuration | Total capacity | 3.6 kWh expansion modules | Price | Price per kWh |
|---|---|---|---|---|
| 1.8 kWh | 1.8 kWh | 0 | €795 | €442 |
| 5.4 kWh | 5.4 kWh | 1 | €1,650 | €306 |
| 9.0 kWh | 9.0 kWh | 2 | €2,450 | €272 |
| 12.6 kWh | 12.6 kWh | 3 | €3,250 | €258 |
| 16.2 kWh | 16.2 kWh | 4 | €4,050 | €250 |
| 19.8 kWh | 19.8 kWh | 5 | €4,850 | €245 |
Our verdict on the Indevolt SolidFlex 3000
The Indevolt SolidFlex 3000 AC is a powerful and easy-to-use plug-in home battery. It offers smart energy management, flexible storage capacity and several useful features. During our tests, we were especially impressed by the easy installation and the performance of the self-consumption and dynamic tariff modes.
A strong choice for households that want to store solar energy and cut electricity costs, held back by an unfinished AI mode and a slightly below-average efficiency.
- 3,000 W output: high power for a plug-in battery.
- Semi-solid battery technology: safer battery chemistry than many standard alternatives.
- Cluster support: up to three systems can work together in one home.
- Easy installation: simple setup and user-friendly app.
- Dynamic tariff mode: works well and makes logical decisions based on your settings.
- Self-consumption mode: keeps grid import and export close to zero most of the time.
- Local API and Home Assistant: full local control without relying on the cloud.
- Silent and protected: passive cooling, IP65 protection and suitable for a wide range of locations.
- AI mode: still inconsistent and can make poor decisions, which limits savings.
- Round-trip efficiency: slightly lower than comparable systems.
- Expensive at small capacity: around €442 per kWh at roughly 1.8 kWh.
- Poor mounting screws: the supplied screws do not fit the holes properly.
Our final verdict: 4.3/5
With a final score of 4.3 out of 5, the Indevolt SolidFlex 3000 AC is a strong choice for households looking to store solar energy and reduce electricity costs. Its easy installation, flexible capacity and smart controls are its biggest strengths. The AI mode still needs improvement, but the standard operating modes work very well. The RTE is also slightly below average.
Not sure whether this is the right size for your home? Try our home battery calculator or compare it with other batteries in Compare For Yourself.
Common questions about the Indevolt SolidFlex 3000 AC
What score did the Indevolt SolidFlex 3000 AC get?
We scored it 4.3 out of 5: design 4.5, installation 5, app functionality 4 and the back-up power socket 4.
How efficient is the Indevolt SolidFlex 3000 AC?
We measured a round-trip efficiency of 79.6% with 1,200 W charging and 2,400 W discharging. Efficiency can differ at other power settings.
How long does installation take?
About 10 minutes in total for the battery and P1 meter, thanks to Bluetooth pairing and the LoRa link between the P1 meter and the battery.
Can it keep appliances running during a power cut?
Yes, through an integrated back-up socket with up to 3,000 W, depending on the battery setup. The system switches to battery power in about 10 milliseconds. It powers a few appliances, usually through an extension lead, not the whole home.
How much does it cost per kWh?
The 1.8 kWh unit cost €795 in September 2026, about €442 per kWh. The price per kWh falls as you add 3.6 kWh expansion modules, to about €245 per kWh at 19.8 kWh.
Does it work with Home Assistant?
Yes. Indevolt supports a local API and Home Assistant, so you can control the battery locally without relying on the cloud.
Related guides
Still not sure which battery fits your home?
Use our calculator to size a battery for your own usage, or put the SolidFlex next to other batteries in Compare For Yourself.